 Agentic Engineering Extension
Agentic Engineering Extension
Agentic Engineering Extension
Agentic Engineering Extension statically analyzes LangGraph and CrewAI codebases and renders every agent, tool, model, and control-flow path as an interactive graph. For LangGraph projects, you can also run it, replay it, edit it, and evaluate it, right inside VS Code, Cursor, Windsurf, or Antigravity.
LangGraph and CrewAI support.
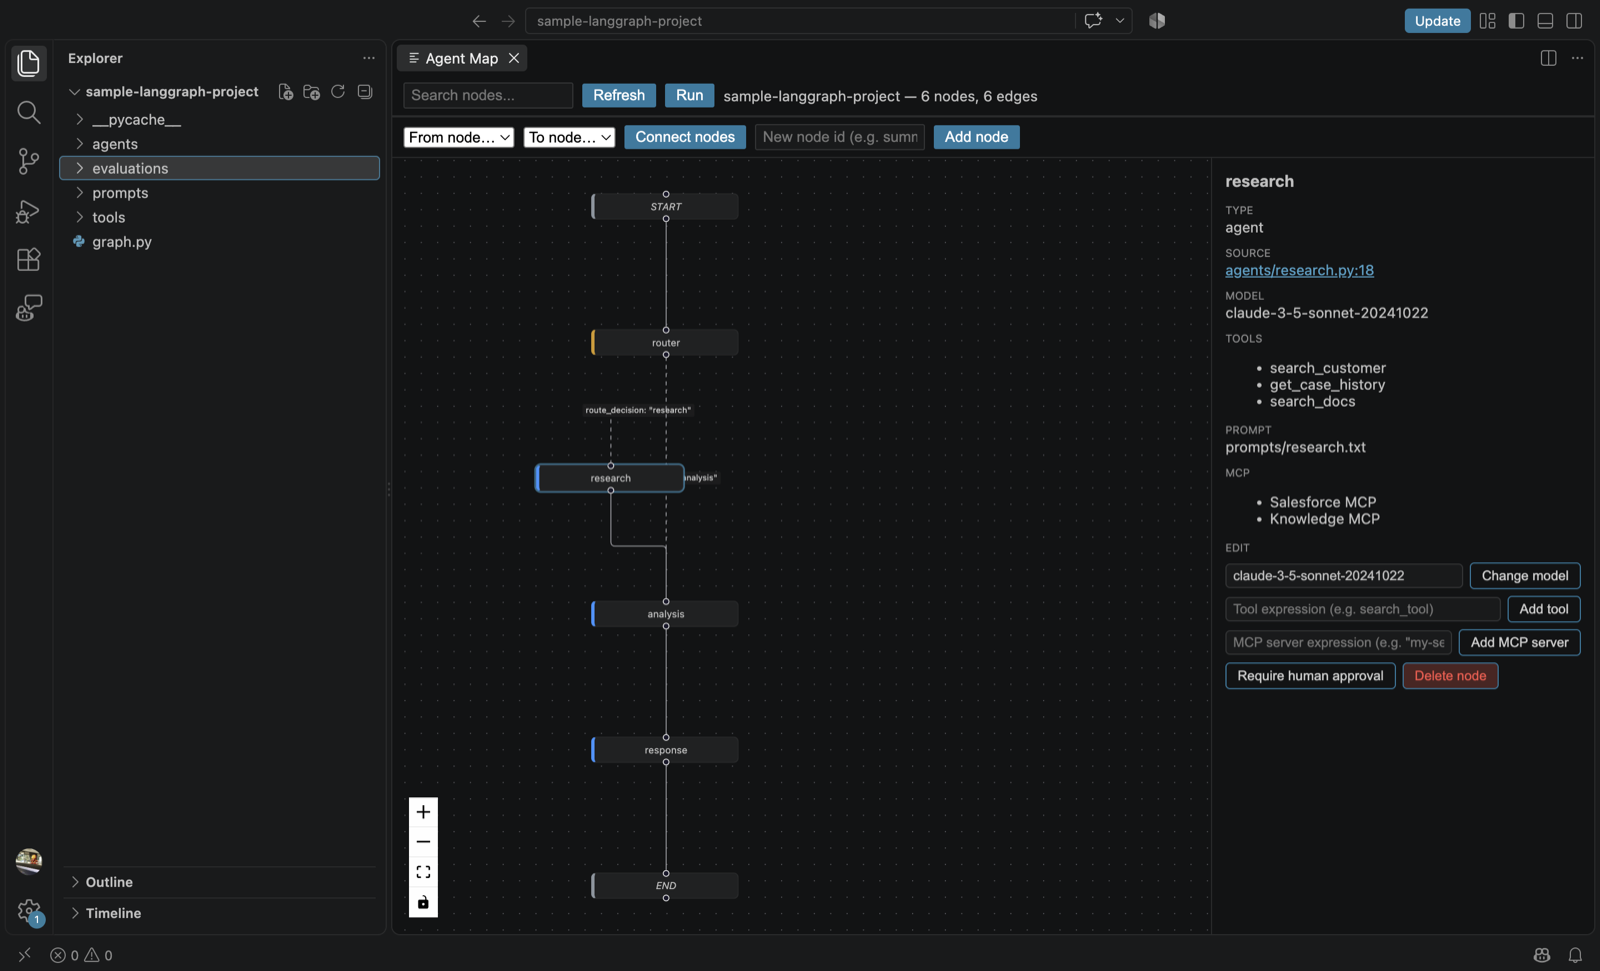
Agentic codebases (LangGraph graphs, CrewAI crews) spread their real architecture across many files: a graph-builder module, a folder of agent implementations, a prompts directory, a tools module. Simple questions are hard to answer without reading all of it:
Right now a developer has to manually open and cross-reference several files every time. There's no visual, up-to-date map of the system, and no fast way to run, inspect, or regression-test it from inside the editor.
It runs real static analysis on your source (no fabricated metadata) and gives you one visual, always-in-sync map of the system. For LangGraph projects, you can also run it, replay any step, edit it visually, and evaluate it against a test dataset, all backed by real code and real execution traces.
An interactive graph of every agent, edge, conditional branch, and entry point, themed to match your editor. Click any node to jump straight to its source file and line.
See it step by step →Model, prompt file, tools, and MCP servers are shown only when actually found in source. If it can't be confirmed, it's simply omitted.
See it step by step →Execute the real compiled LangGraph, capture a per-node trace, and replay execution from any node in that trace, directly on the graph.
See it step by step →Add and connect nodes directly in the graph UI. Changes are written back to real Python source, not just an in-memory diagram.
See it step by step →Run a JSON dataset of test cases against your graph, see per-case pass/fail with real latencies, and get flagged the moment a case that used to pass starts failing.
See it step by step →10 commands, from "Find Unused Tools" to "Explain Architecture," that analyze your real graph and code. LLM-backed answers always cite real file:line locations and say "I don't know" rather than invent one.
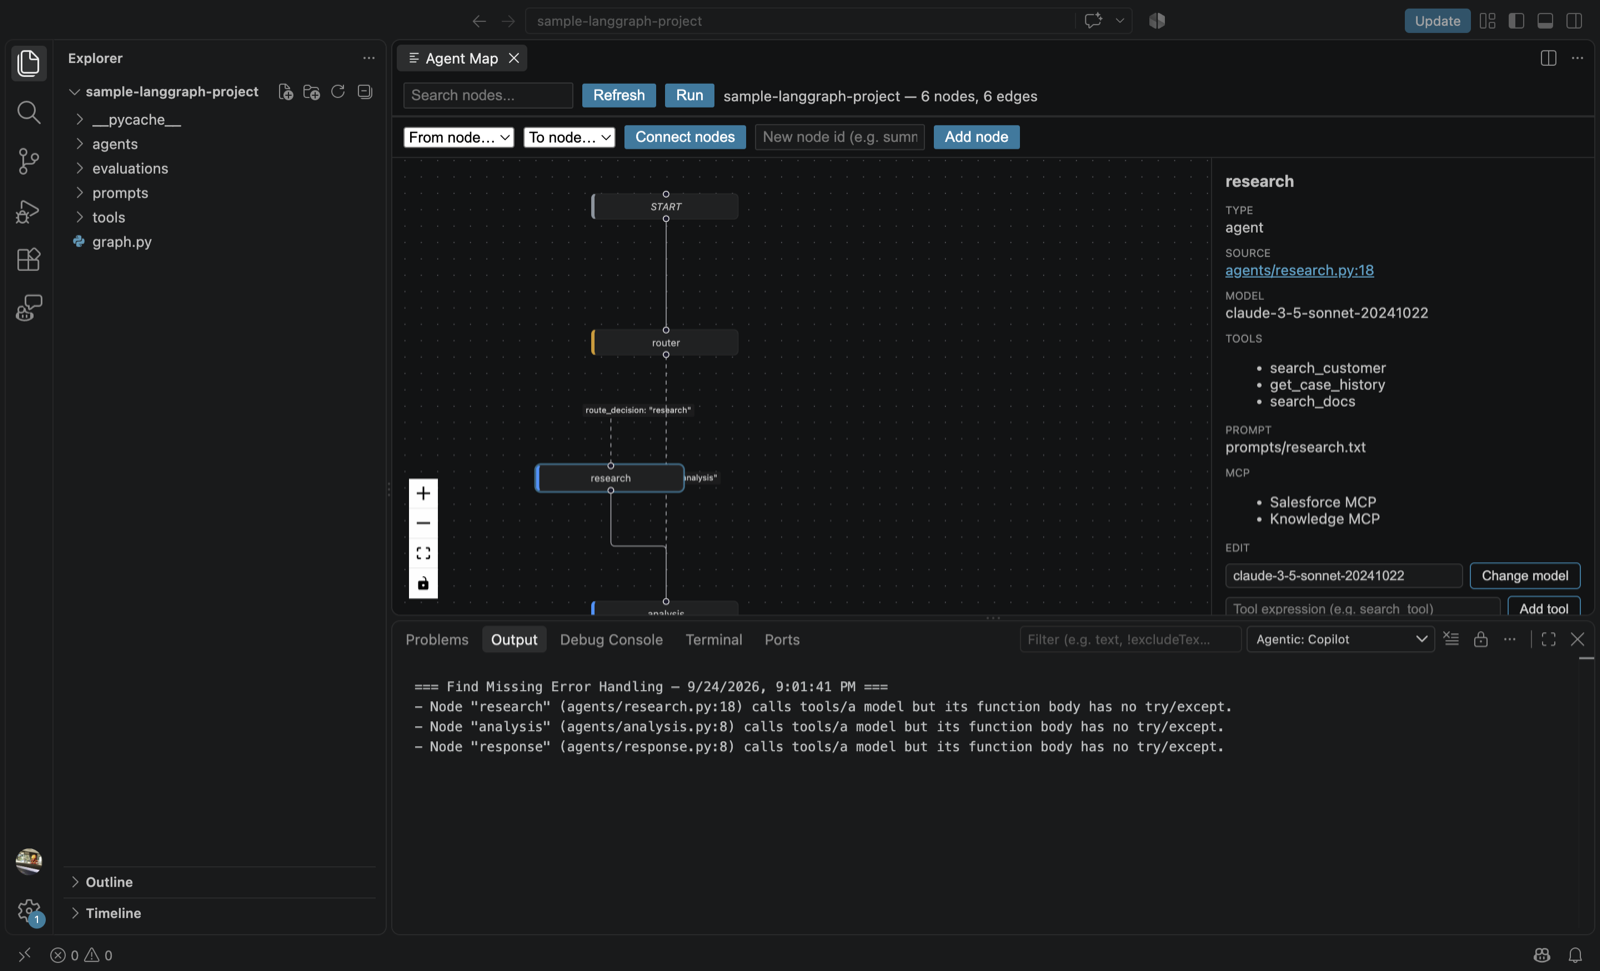
Real output from Agentic: Find Missing Error Handling. Every finding cites an actual file and line.
Full support
Visualize, run, replay, visually edit, and evaluate. The complete workflow.
Static analysis only
Visualize crews of agents/tasks and jump to source. Editing, execution, and evaluation support are on the roadmap.
Built on a framework-agnostic normalized model: the same analysis, copilot, and test-generation code runs unmodified against both frameworks. More adapters (for example, the OpenAI Agents SDK) can be added without touching the visual layer.
Available now on the
Visual Studio Code Marketplace.
In VS Code, open the Extensions view (Cmd/Ctrl+Shift+X), search
"Agentic Engineering Extension," and click Install, or run:
code --install-extension iroy2000.agentic-engineering-extension
Also available on
Open VSX
for Cursor, Windsurf, Antigravity, and other VS Code-compatible editors
that don't pull from the VS Code Marketplace. Search "Agentic
Engineering Extension" in your editor's extensions view, or install
via the ovsx CLI / your editor's Open VSX registry setting.
Requires VS Code 1.93+ (or an equivalent Cursor/Windsurf/Antigravity release).
Open the root folder of a LangGraph or CrewAI project in your editor, or run Agentic: Open Sample Project from the Command Palette to try a bundled sample instantly — no separate download needed.
Command Palette (Cmd/Ctrl+Shift+P), then Agentic: Open Agent Map. Your agents, tools, and control flow appear instantly.
Click any node to see its model, prompt, tools, and MCP servers, then click the source link to jump straight to that line of code.
Use Agentic: Run Agent to execute and trace a real run, replay from any node, or add/connect nodes visually to edit the graph's real source.
Agentic: Run Evaluation checks your graph against a test dataset and flags regressions. The Agentic: Copilot commands answer architecture questions grounded in your real code.
Want screenshots for every step? See the full walkthrough guide.